Showing posts with label eva sherman designs. Show all posts

Monday, September 17, 2012

Free Tutorial - Queen Victoria Cuff


 Queen Victoria Cuff
By Eva Marie Sherman

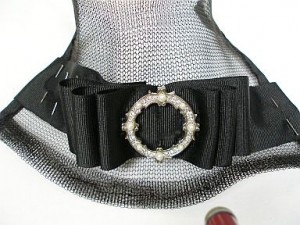
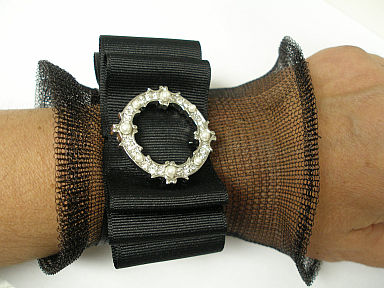
WireKnitZ® makes a beautiful canvas for vintage themed creations and you’ll feel as elegant as the Queen in this dramatic cuff!  Create the cuff, finish it with hand stitched grosgrain ribbon, and add a vintage pin for drama!

MATERIALS AND TOOLS
1 – 9” 3000 Series WireKnitZ®
Fireline® 4 lb. braided beading thread
2 – 6” x .5” Grosgrain Ribbon
1 – 30” x 1.5” Grosgrain Ribbon
3 – Sew-On Snaps
1 – Vintage Pin
Scissors
Tape Measure
Fabri-Tac™
Sewing Needle

STEP 1
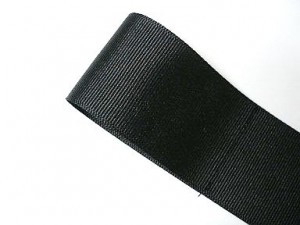
Fold ribbon in half and make a seam 2” away from the fold
STEP 2
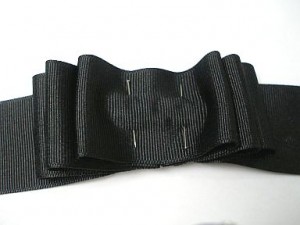
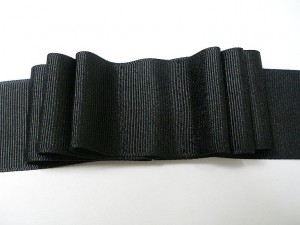
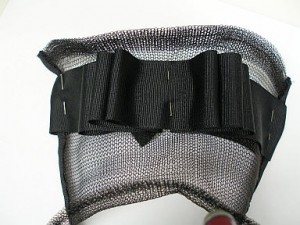
Open ribbon and make three folds on each side. Pin and then stitch in place.
STEP 3
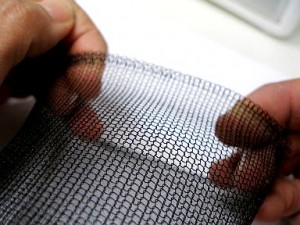
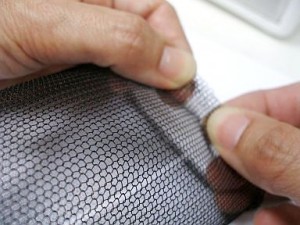
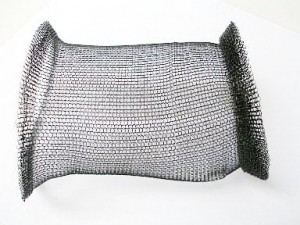
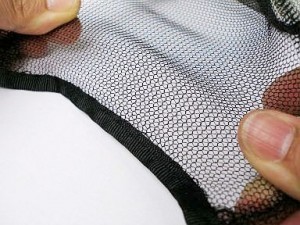
Open WireKnitZ® tube and gently massage folded edges until smooth. At one end, gently pull outward with fingers until the end begins to roll outward and then roll three times to measure about ¼” wide. Press the roll down with fingers all the way around, burying the cut end. Repeat at opposite end.
STEP 4
Stretch each end to get a slight bell shape. Stitch rolled ends in place, if desired, though it is not necessary.
STEP 5
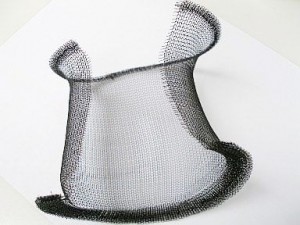
Make a cut down the length of the tube. Fold the 1/2” grosgrain ribbon in half lengthwise and pin in place along the cut edge of the WireKnitZ® tube. Tip: Before pinning to WireKnitZ®; create a soft crease in the grosgrain ribbon by gently ironing with a light weight towel to protect the ribbon.
STEP 6
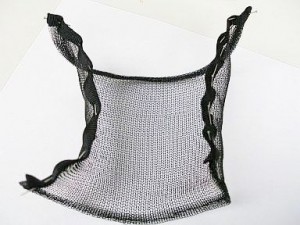
Measure your wrist and size WireKnitZ® 1” larger than your wrist size. Depending upon wrist size, WireKnitZ® may be made larger by stretching width at ribbon edges, or made smaller by stretching length at rolled edges. To stretch, grasp opposing edges and gently pull, moving fingers along edges. Keep moving fingers around and pulling as WireKnitZ® begins to adjust in size. When the sheet is the correct size, stop stretching. A bit of trial and error may be required.
STEP 7
Line up the center of the tri-folded 1.5” grosgrain with the center of the WireKnitZ®, approx. ¾” from the top roll and pin centers together. Pin rest of ribbon in place, folding edges of ribbon under twice. Tip: Use Fabri-Tac to secure ends of ribbon.
STEP 8
Stitch grosgrain ribbon in place. Secure vintage pin at center of tri-folded ribbon.
STEP 9
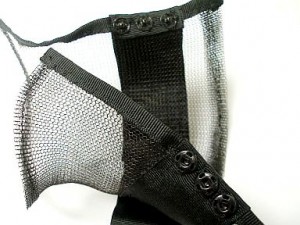
Stitch sew-on snaps in place as shown.
Enjoy the complements!

Tuesday, July 17, 2012

YOJ Week 29 - Ride the Wave!

I don't know why I do this to myself. I'm leaving tomorrow to teach for 2 days at the Create Mixed Media Retreat in New Jersey. I should be packing, making a list, checking it twice...

But no.....

I got distracted by an idea and HAD to finish it. It started out as a triple wave cuff, but then it occurred to me that I should add some color. These beautiful enameled flowers by C-Koop are the perfect accent. It looks like the flowers are literally riding a wave down my wrist. I love it. I can't stop looking at it.


But now I really must get packing....

PS: There is still room in my classes..... :-)

Eva's Workshops at Create Mixed Media Retreat:
  • Scribble Cuff & Doodle Rings (6 hours) (Thursday)
  • Banner Wrap Beach Glass (3 hours) (Thursday evening)
  • Textured Cuffs & Scrapbox Rings (6 hours) (Friday)

Wednesday, June 6, 2012

YOJ Week 23 - Sleeping Beauty Ring

Tomorrow morning, bright and early, I'm heading to Bead & Button! But today is for packing, list checking and wrapping up loose ends....like posting my Year of Jewelry project for week 23. I'm quite proud of myself for not missing a post yet this year, even though some of my projects are so simple, it almost feels like cheating.....

This little sleeping beauty turquoise came from my Tucson shopping haul earlier this year. I'm into "cocktail" style ring designs these days, so it seemed like a no brainer to make a coiled-coil as a bed for the lovely (yes, it really is that vivid) turquoise bead.

And now I can't wait to shop for more gorgeous beads this weekend to make more cocktail rings, cheers everyone!
:-)

Sunday, May 6, 2012

OK, one more....

.....and now I really must quit goofing around in the studio and get some bills paid. 
:-)


Friday, May 4, 2012

The Corrugated & Fold Formed Cuff

Charles Lewton-Brain is my new hero! He developed fold forming; "a series of techniques new to the metalsmithing field which allow rapid development of three dimensional surfaces and structures using simple equipment". Rapid and simple being at the heart of most of my work, this is right up my alley! 

Here's what I did: I ran a strip of 24 ga annealed copper thru a microfold brake, then folded it using an origami fold, also known as the "ward" fold. After re-annealing and opening the folds, I lightly hammered it flat with a mallet, and finally I gave it a "bow" by standing it on it's edge and again lightly hammering with a mallet. The whole piece was then curved on a mandrel and riveted to a 20 ga back plate for stability. 

If you need me, I'll be in the studio.... :-)

Tuesday, May 1, 2012

YOJ Week 19 - The Ruffle Cuff

More layering. More ruffling. More heat patina experimenting....


Friday, April 27, 2012

YOJ Week 18 - The Ribbon Cuff

I like to play with metal. I like to make it move and I like to make it take organic shapes. Sometimes it's a hit, sometimes not quite....

Not exactly sure which category to put this one in....constructive crits welcome...


Thursday, April 19, 2012

Re-post from a Bead Fest Student

Thank you Kathleen!!! :-)
You can see Kathleen's original post here...

On Saturday evening I took a class with Eva Sherman, owner of Grand River Beads, titled Textured Copper Cuffs. Eva showed us how to anneal copper with a torch, texture it, form and rivet it. She also brought in some gorgeous cuffs that she created, wetting our appetites.


She then set us loose to create two-three cuffs of our own. It didn't take me long to get over my torch phobia either! Here is what I created...


Both Eva and Brenda were fantastic instructors! I really enjoyed each class and my newly acquired knowledge. Can't wait to create! By the way, both classes will be offered at Bead Fest in August!

Wednesday, April 11, 2012

Thursday, September 1, 2011

Jenny's Neck Piece


When Jenny Rohrs of Craft Test Dummies asked me to lend a hand designing a neck piece to wear to a wedding, I was both flattered and slightly intimidated. I mean this gal knows EVERYONE in the art jewelry world! But in my favor, she's a good friend and knows how easily I can be persuaded to drop everything for the opportunity to play with wire. That and a cupcake bribe will work every time! :-)

So, we came up with a basic plan & color scheme and agreed on an asymmetrical look. I started by  making a "dahlia" focal and wiring it to a silver neck collar. Adding some randomly spaced beads and wrapping a strand of twisted wire through the piece completed the look. One final adjustment of the coils to create the illusion of a vine and voila! What do you think?

And she wears it so well!